Tutorial: Set Up 3D Lighting for 2D Characters in After Effects
Learn How to Set Up 3D Lighting for 2D Characters with This After Effects Tutorial
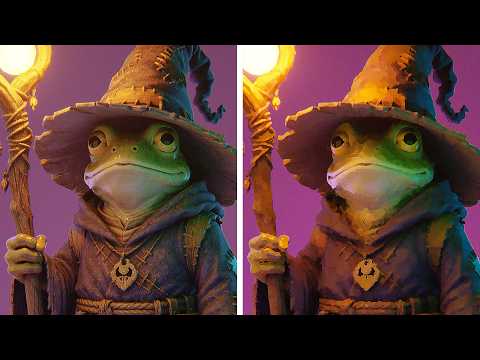
3D and VFX artist Swoon showed how to use the Normality plugin from Stefan Minning to create 3D lighting in a 2D piece.
3D and VFX artist Swoon shared their tutorial on making a 2D character come to life by applying 3D lighting with the Normality plug-in from Stefan Minning. It's a free plug-in that was made to light 3D objects and scenes directly inside Adobe After Effects by utilizing normal passes and advanced relighting techniques.
The first step is generating a normal map from the 2D image you are working on. You need to make sure both images are the same size. Then you have to click Pre-Compose and add them there with 'Move all attributes' selected. After that, you have to duplicate your base layer and turn off the visibility of the layer containing your normal map.
Then, in your Normals submenu, select the Normal Map layer and create a point light. Then pick the blending mode you like in your Normality layer settings. To enhance the point light effect, you need to darken your base layer a bit using curves. Then, you need to find Rim Light in Normality's settings and pick a color for your lighting. You can also adjust its angle, width, and other parameters.
After that, you have to enable toon shading for a more dramatic effect. By picking different hues for highlights, shadows, and the main color of your toon shader, you can create a beautiful color play in the scene. You can also set the latter two to black to have more contrast. You can also experiment with halftones, noise, and Deep Glow depending on how stylized you want the effect to look.
You can see the full tutorial on the artist's Twitter.
The artist also has a tutorial on dynamic lighting in After Effects that you can check out here.